Kindred Stamps February Release: Fruit Friends
When I was younger, I had a bedroom with pink curtains, pink area rug, a homemade bedspread by my godmother with the bedskirt attached to the top quilt covered in strawberries, and a strawberry toy box. The Fruit Friends stamp set and the Sweet Strawberries Paper Pack took me back to my bedroom as a child.
This blog utilizes affiliate links for the products that I utilized. By clicking on the links, you are supporting me without any cost to you. I thank you for your support if you choose to utilize the links provided. Let’s head down to the berry patch!

Fruit Friends, Kindred Stamps
Project One: Berry Bed
When I saw the papers in the Sweet Strawberries paper pack, I saw my bedroom quilt from childhood. My Aunt Karen (and Godmother) made my quilt out of the patterned fabric full of strawberries and gingham. The attached skirt on the quilt hid all my toys that I shoved under the bed when I was told to “clean” my room. Best invention ever for a 7 year old. This card showcases some of the patterns that were in my quilt.
From the Sweet Strawberries paper pack, I pulled out the green gingham, the framed strawberries on a pink with white polkadot background, and finally the red with white polkadot papers. The red polkadot paper was cut into a quarter inch strip. This quarter inch strip was then centered on the large rectangle for the Card Basics Die set. The Card Basics Dies panel was also utilized to cut both (gingham and strawberry) panels so that the stitched detailing would be consistent between all sections. The panels were sized to divide the main card panel into thirds separated by the red and white polkadot paper. The panels were attached together with liquid glue and set aside to dry.
The Red Girl from the Fruit Friends stamp set was colored with Olo Markers (see Color Guide below). She was fussy cut out and thin foam tape was applied. Utilizing a tag die from my stash, I die cut a simple stitched tag on a pink card stock. Thin foam tape was applied to the back of the tag and the card was assembled. I added the leftover red with white polkadot paper to the top of the tag. To embellish the card I added some pink and white clay hearts that I picked out a some limited edition Kindred Stamps shaker kits. I didn’t want a sentiment on the front of the card. It just didn’t feel right, so I placed the sentiment “Have a berry fun birthday” inside the card.
Card Size: A2 (5.5 by 4.25 inches)

Fruit Friends, Kindred Stamps
Project Two: Rainbow Berry Best
All I see is rainbows when I look at this Fruit Friends stamp set. So why not make a rainbow of Fruit Friends wishing the recipient the berry best??
Using simple masking techniques, I arranged the friends in rainbow order in an arch on my card panel to mimic a rainbow. The friends were stamped in alcohol safe ink and masking paper applied. The background was then ink blended in a gradient fashion with Concord & 9th Carnation and Ballet Slippers.
The Fruit Friends were colored with Olo Markers (see Color Guide below). White gel accents and black glaze pen were applied to the Fruit Friends as appropriate. The colored panel was cut down to 6.75 by 4.75 inches. The sentiment was stamped in pigment ink and Clear Embossing Powder was applied and heat activated. An A7 card base was prepped and a piece of 5 by 7 inch pink paper was adhered. The rainbow colored panel was centered and glued flat to the pink card base panel.
Card Size: A7 (5 by 7 inches)
Fruit Friends, Kindred Stamps
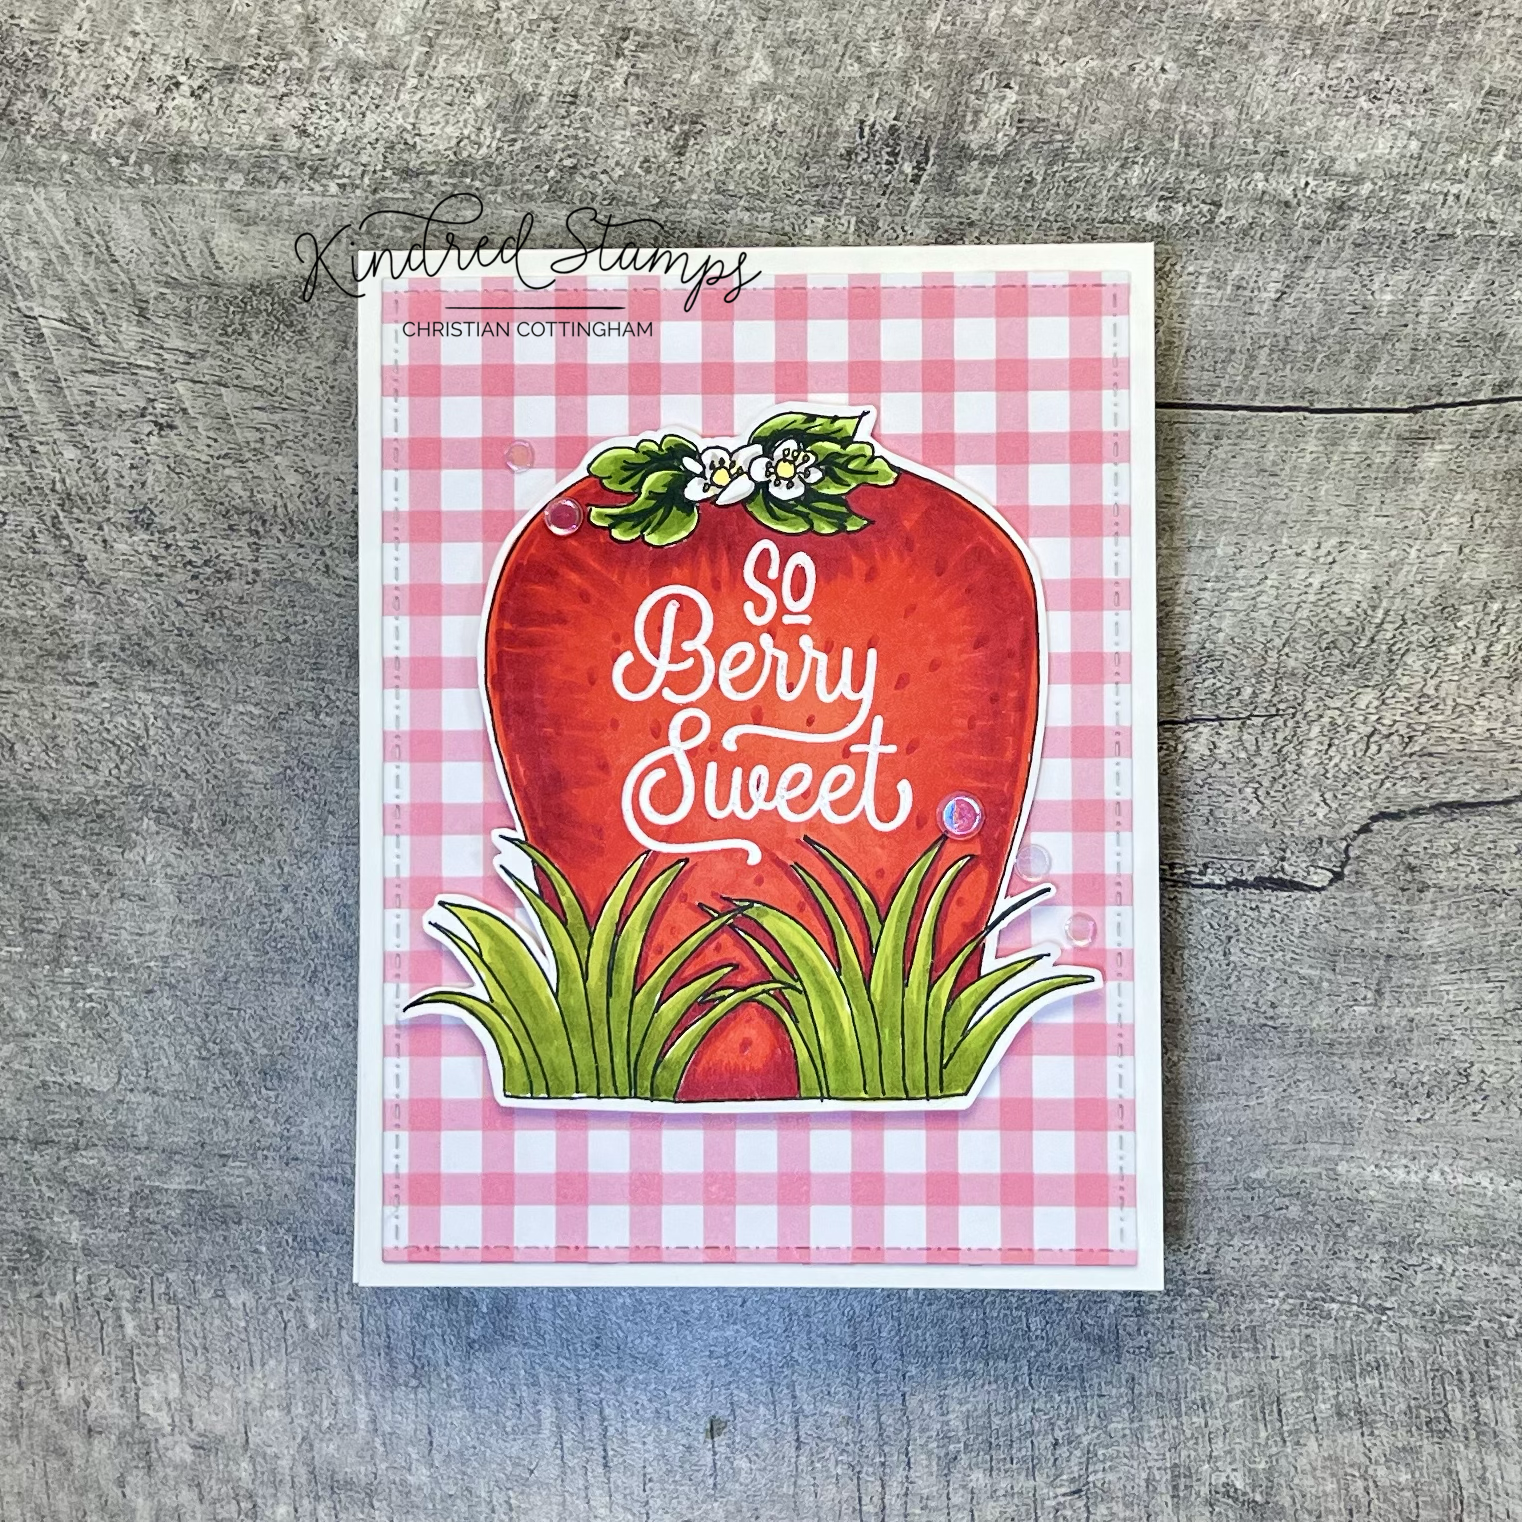
Project Three: Strawberry Toy Box
In my childhood bedroom I had a strawberry toy box. The plastic it was made out of had that artificial strawberry smell that I could identify even today. I know that the lid never really fit right on the top and according to my mother, it never actually had toys in it… This card is a tribute to my toy box as a child.
To make this card, I grabbed my pencil and sketched a strawberry and then a couple leaves and flowers on top. To add a little spunk, I used the Grass and Clouds stencil as my template for drawing the grass at the base of the strawberry.
To color the strawberry I utilized a combination of Olo Markers and Altenew Artist Markers. The leaves on the strawberry were colored with Altenew Artist Markers (G554/ G715/ G702). The flower was colored with Olo Markers (WG3; Y2.2). The berry was colored with Olo Markers (R0.6/ R0.5/ R0.4). Finally, the grass bunches were colored with Altenew Artist Markers (G915/ G804/ G825).
The sentiment “So Berry Sweet” was heat embossed with Snowfall Embossing Powder from the Fruit Friends stamp set. The strawberry design was fussy cut out and foam tape was applied. For the background of the card, I pulled out a piece of gingham paper from the Sweet Strawberries paper pack. This design was one of the blocks on my childhood quilt. I cut this panel down with the Card Basics Dies and adhered it to the card base. The strawberry was centered on the card panel. Because every little girl with a pink bedroom loves sparkle, I added some iridescent sequins for some bling bling.
I wonder whatever happened to my strawberry toy box. This card is my tribute to my fake plastic smelling strawberry toy box of years gone by. I salute you my friend, where ever you ended up. May your strawberry fields be of plenty.
Card Size: A2 (5.5 by 4.25 inches)

Fruit Friends, Kindred Stamps
Project Four: Strawberry Candles & Berry Wishes
Nothing says a birthday like birthday candles! The candles of this card showcase some of the linear pattern paper from the Sweet Strawberries paper pack and a couple Fruit Friends. To make this card a piece of pattern paper full of strawberries was adhered to an A2 card front.
With a piece of pale green card stock and the Skinny Plaid stencil a simple subtle backdrop with white pigment ink was made. When dry, the panel was cut down with the Card Basic die. The candles were cut into strips from the pattern paper and thin foam tape applied. The flames were cut from mirror gold card stock and thin foam tape applied.
The Blue Girl and Blue Boy were colored with Olo Markers and fussy cut out. (See Color Guide below). The sentiment from Fruit Friends, “Have a Berry Fun Birthday” was stamped in Red Hot ink from Gina K Designs, then with embossing ink. Clear Embossing Powder was applied and heat set. Finally the sentiment was framed with the same pale green paper that was used for the backdrop.
To assemble the card, the candles and flames were placed on the stenciled panel. The Blue Girl and Blue Boy were placed flat on top of the candles. Thin foam tape was applied behind the sentiment and centered on the candles. Finally the plaid panel was centered onto the patterned paper card front.
Card Size: A2 (5.5 by 4.25 inches)

Fruit Friends, Kindred Stamps
Project Five: Berry Artist
One of the Fruit Friends is an artist just like us who are making cards with this fun set! Because these Fruit Friends are so small, the little artist and her model are in between the blades of grass.
To make this card I got out my trusty pencil and started some sketching some long blades of grass that frame the center of the card panel. The horizon line was masked off and the the sky and then the ground were ink blended softly with Altenew inks in Arctic and Frayed Leaf respectively. The blades of grass were colored with Altenew Artist Markers in G554/ G715/ and G702. This panel was die cut with the Card Basic Die.
I pulled out the Art Supplies Die (retired) and die cut the easel 3 times and cut down to add the layers for dimension. The art easel was colored with Olo Markers to mimic wood (OR3 .8/OR 3.7/ OR 3.4). The canvas was partially stamped with the Cat and partially colored with Olo R2.2. The canvas was drawn in and colored with Olo Markers B0.2/ G0.1. The easel was assembled and set aside.
The Orange girl and her cat model were colored with Olo Markers and fussy cut out (see Color Guide below). The sentiment was stamped in Sapphire ink from Altenew and then ink blended with the Arctic ink to match the background sky.
To assemble the card, a deep green card panel was placed onto a card base. The grass panel was popped up with foam tape onto the base. The easel was centered between the blades of grass. The Orange Girl and her Cat model were popped up and placed in front of the easel. Finally the sentiment was popped up and centered on the top of the panel. The artists work is never done… so let’s move on to the last set of cards.
Card Size: A2 (5.5 by 4.25 inches)

Fruit Friends, Kindred Stamps
Project Six: Berry Gift Set
The Fruit Friends stamp set is perfect for making a card set as a gift for someone “berry” special. Each of the Fruit Friends are represented on their own card with their own saying.
Simple layered watercolor in a faux dip technique was painted at an angle for each of the friends in rainbow order. The sentiments were stamped in watermark ink and heat embossed with Snowfall Embossing Powder. The panels were cut down with the Card Basic Die and foam tape was applied to smooth out any warping that had occurred. The Fruit Friends were colored with Olo Markers (see Color Guide below) and fussy cut out. Thin foam tape was applied behind the Friends. These simple cards were assembled and ready to be given as a set to a “berry” special someone.
Card Size: A2 (5.5 by 4.25 inches)
The entire Kindred Stamps release will be available this Friday at 8am PST/11am EST. Be sure to subscribe to the Kindred Stamps blog to see a daily line up of sneak peeks from our amazing Design Team! Come join the Fan Club and release event to be part of the release fun, and you may just win some Kindred Stamps credit!!
Color Guide: Olo Markers unless otherwise noted.
Red Girl:
Flesh> OR2.0/ OR3.2/ OR4.2/ R0.3
Hat> R2.2/ R2.4; R0.5/ R0.4
Apron> WG1; YG1.4/ YG1.6
Tights> WG1; YG1.4/ YG1.6
Dress> R0.4/ R0.5
Strawberry> R0.4/ R0.5; YG1.4/ YG1.6
Shoes> O4.3/ O4.6
Hair> R1.5/ R1.7
Pink Girl:
Flesh> OR2.0/ OR3.2/ OR4.2/ R0.3
Leaf> YG1.4/ YG1.6
Flower> Altenew Artist Markers R603/ R614
Hat> Altenew Artist Markers R601/ R603; Old YG1.4
Dress> Altenew Artist Markers R601/ R603
Bloomers> Altenew Artist Markers R603/ R614
Hair> Altenew Artist Markers R603/ R614
Shoes> Altenew Artist Markers R603/ R614
Tights> WG1; YG1.4/ YG1.6
Orange Girl:
Flesh> OR3.2/ OR3.4/ OR3.7/ RV0.3
Tights> WG1; YG1.4/ YG1.6
Leaf> YG1.4/ YG1.6
Flower> O1.2/ O1.3; WG1
Dress> O1.2/ O1.3/ Y2.2
Hat> O2.7/O2.5/ O1.2/ O1.3
Shoes> O2.7/ O2.5
Hair> O7.8/ O7.7
Paint Brush> O4.3/O4.6; WG3
Pallet> WG3; YG1.4; Y2.3; R0.5
Yellow Girl:
Flesh> OR2.0/ OR3.2/ OR4.2/ R0.3
Hat> Y2.0/ Y1.2; YG1.4/ YG1.6
Dress> Y2.0/ Y1.2; WG1
Hair> YO2.3/ YO2.5
Flower> WG1; YO2.5/ YO2.3
Tights> WG1; YG1.4/ YG1.6
Shoes> YO2.5/ YO2.3; Y1.2
Blue Girl:
Flesh> OR2.0/ OR3.2/ OR4.2/ R0.3
Leaf> YG1.4/ YG1.6
Tights> WG1; YG1.4/ YG1.6
Shoes> B0.6/ B0.5
Bucket> B0.6/ B0.5/ B0.7/ B0.3
Dress> B0.3/ B0.5
Apron> B0.5/ B0.3
Flower> B0.5/ B0.3
Hair> B0.6/ B0.5. B0.3
Hat> B0.7/ B0.6/ B0.5/ B0.3
Ribbons> R2.2/ R2.4
Blue Boy:
Flesh> OR2.0/ OR3.2/ OR4.2/ R0.3
Leaf> YG1.4/ YG1.6
Bibs> B4.7/ B4.6
Kerchief and hems> YG1.4
Shirt> Altenew Artist Markers R601/ R603
Shoes> 04.3/ O4.6
Hat> YO2.3/ YO2.5
Flower> B4.7/ B4.6
Pole> O7.8/O7.7
Fish> O2.7/ O2.5
Purple Boy:
Flesh> OR2.0/ OR3.2/ OR4.2/ R0.3
Tights> WG1; YG1.4/ YG1.6
Leaf> YG1.4/ YG1.6
Hair> B0.5/ B0.3
Bow/ Shorts/ Shirt> V2.3/V2.8
Plum> V2.4/ V2.6
Pencil> YO2.3/ YO2.4; YO2.0; WG9; R2.2
Shoes> O4.3/ O4.6
Cat:
R2.4/ R2.2